The information on this website is not intended or implied to be a substitute for professional medical advice, diagnosis or treatment of any medical conditions. READ HERE
MyHairScope® Usage Intructions

STEP 1:
Client/Patient must download the MyHairScope® App from the Apple or Google App Store. Be certain the client has also created and logged into their account.
STEP 2:
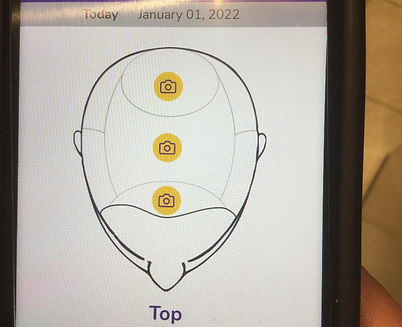
The Hair Care Professional clicks on the yellow camera icon on their client's phone to take the first image.

STEP 3:
With the MyHairScope® (MHS) lying face down on a flat surface (back of the scope toward the hair care professional), power on the scope by holding down the large power button. You will hear a beep and the letter C light up on red and the letter B flashing in blue. The MHS is on.
Press the button one more time and the letter B will light up white.

STEP 4:
In camera mode, hover the client's cell phone over the small lens on the right side of the back of the scope. Align the yellow line with the "0" of the guide. Once aligned set the phone onto the sticky attachment surfaces and press gently to secure the phone into place.

STEP 5:
Part the client's hair down the middle of the crown of the head to expose the scalp for imaging.
Use the MHS Stencil (and BodyMark pen) to mark positions on the client's head/scalp.
STEP 6:
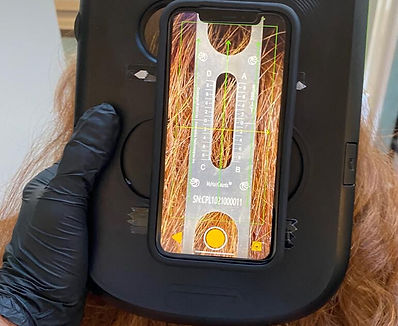
Hover the scope over the approximate position of the marking for the first image to be taken. Slowly lower the scope down toward the client's scalp and locate the scalp marking throught the phone camera. As you continue to lower the scope the marking will come into focus. Align the yellow line and intersecting green line with the center of the marking, the rest the scope on the client's scalp.

STEP 7:
Push the large yellow circle on the bottom of the phone screen to take the image.
On the first image of each session, you will need to enter your License Number to receive award point credit for your session. It is simple, after taking the image, click on the comment box to fill in your license number and information.

STEP 8:
If the image is properly aligned with the marking and the photo image is in clear focus without shadows hiding or distorting the image, then click "Save" icon.
If you need to retake the image, click the retake icon (camera with circle arrow) and redo steps 6-8.

STEP 9:
Click on the camera icon for the next image(s) to be taken and repeat steps 6-8 until you have completed the client's imaging session.
HELPFUL HINTS:
There are four light settings to help improve your image clarity and focus. You may move between settings by pressing the power button.
Normal Use: Letter B will be lite up white.
Front/Side/Back Photos: Letter A will light up in white, the Letter B will flash blue, and the Letter C will stay a constant red. This mode is for photos of the front, sides, and back of the client's head.
Fine Hair/Some Balding/Shiny Scalp: The Letter C light is a constant white and the Letter B flashes blue.
Balding/least amount of hair: The Letter D is a constant white, the Letter B flashes blue, and the Letter C is a constant red. This is the lowest amount of light and most appropriate for clients with the least amount of hair.